Why Build a Keyboard?
I’ve been using a Kinesis Advantage 360 for about two years now, and it’s a fantastic keyboard. It took some getting used to, but it is just so much easier to type with now. I’ve also since switched to using a trackball mouse, which as a teen I used to make fun of since I thought of it as a gimmick — completely oblivious to RSI, other health issues, and accessibility overall.
For me, the next step would be not having to move my hands at all, by having the trackball accessible on the keyboard itself. I initially thought of taking a Dremel to the Kinesis and putting the Logitech guts in it somehow. I’m glad I didn’t, as I would have probably ruined this expensive keyboard.
I had already seen trackball (and trackpad) keyboards before, and finally decided to get the Charybdis MK2 by Bastard Keyboards — a split ergonomic keyboard with an integrated trackball. The kind of keyboard that probably makes other people at the office either very curious or very concerned for your mental health.
Expectations
The last time I seriously soldered anything was probably back in 2012. Nevertheless, I was pretty confident. I also had zero 3D printing experience beyond a very brief stint at the Cambridge Maker Space where I printed something forgettable and left feeling like I understood the technology (I did not).
Armed with a Bambu Lab printer, a cheap soldering iron, and the kind of confidence that only comes from not knowing what you’re about to get yourself into, I started the build.
A Humbling Experience
Here’s the thing about the Charybdis MK2 — the PCBs are reversible. You use the same PCB for both halves, just flipped. A critical detail that is clearly documented in the build guide (and by just looking properly at the PCBs!). A build guide that I did not pay much attention to.
I was halfway through soldering components on the wrong side of the PCB when I started running out of parts. That’s when the penny dropped and I got that sinking feeling.
Now, desoldering with a proper station is annoying. Desoldering with just a basic iron and some really thin wick? That’s an exercise in patience. In the process of trying to salvage the board, I lifted my first trace ever. The few through-hole parts especially were a nightmare — it took a good chunk of my Saturday.
But it got worse. After I printed the right-hand side of the keyboard, I had the bright idea of using a heat gun to “smoothen out the 3D print”. What I didn’t think about was warping — the key switches didn’t fit! Since this was my first 3D print, and having ordered the keyboard switches myself, I didn’t know if it was the switches (there are a bunch of form factors), the 3D print model, the heat gun, or a combination. Instead of being patient and printing another part (which takes 8+ hours), I decided to brute force it. Without a Dremel, without filing tools on hand, it was almost traumatic. I spent 12 hours on this thing, more if I include actually getting the keyboard to work. Whether from the repeated heating, the physical stress of desoldering, or the bending during handling, the PCB ended up with multiple broken tracks. Not just one sad lifted pad — we’re talking several traces that simply gave up on life. I downloaded the schematics and, armed with a cheap multimeter, started debugging. I also didn’t have a magnifying glass, and in about 3 cases it was actually a cold joint issue.
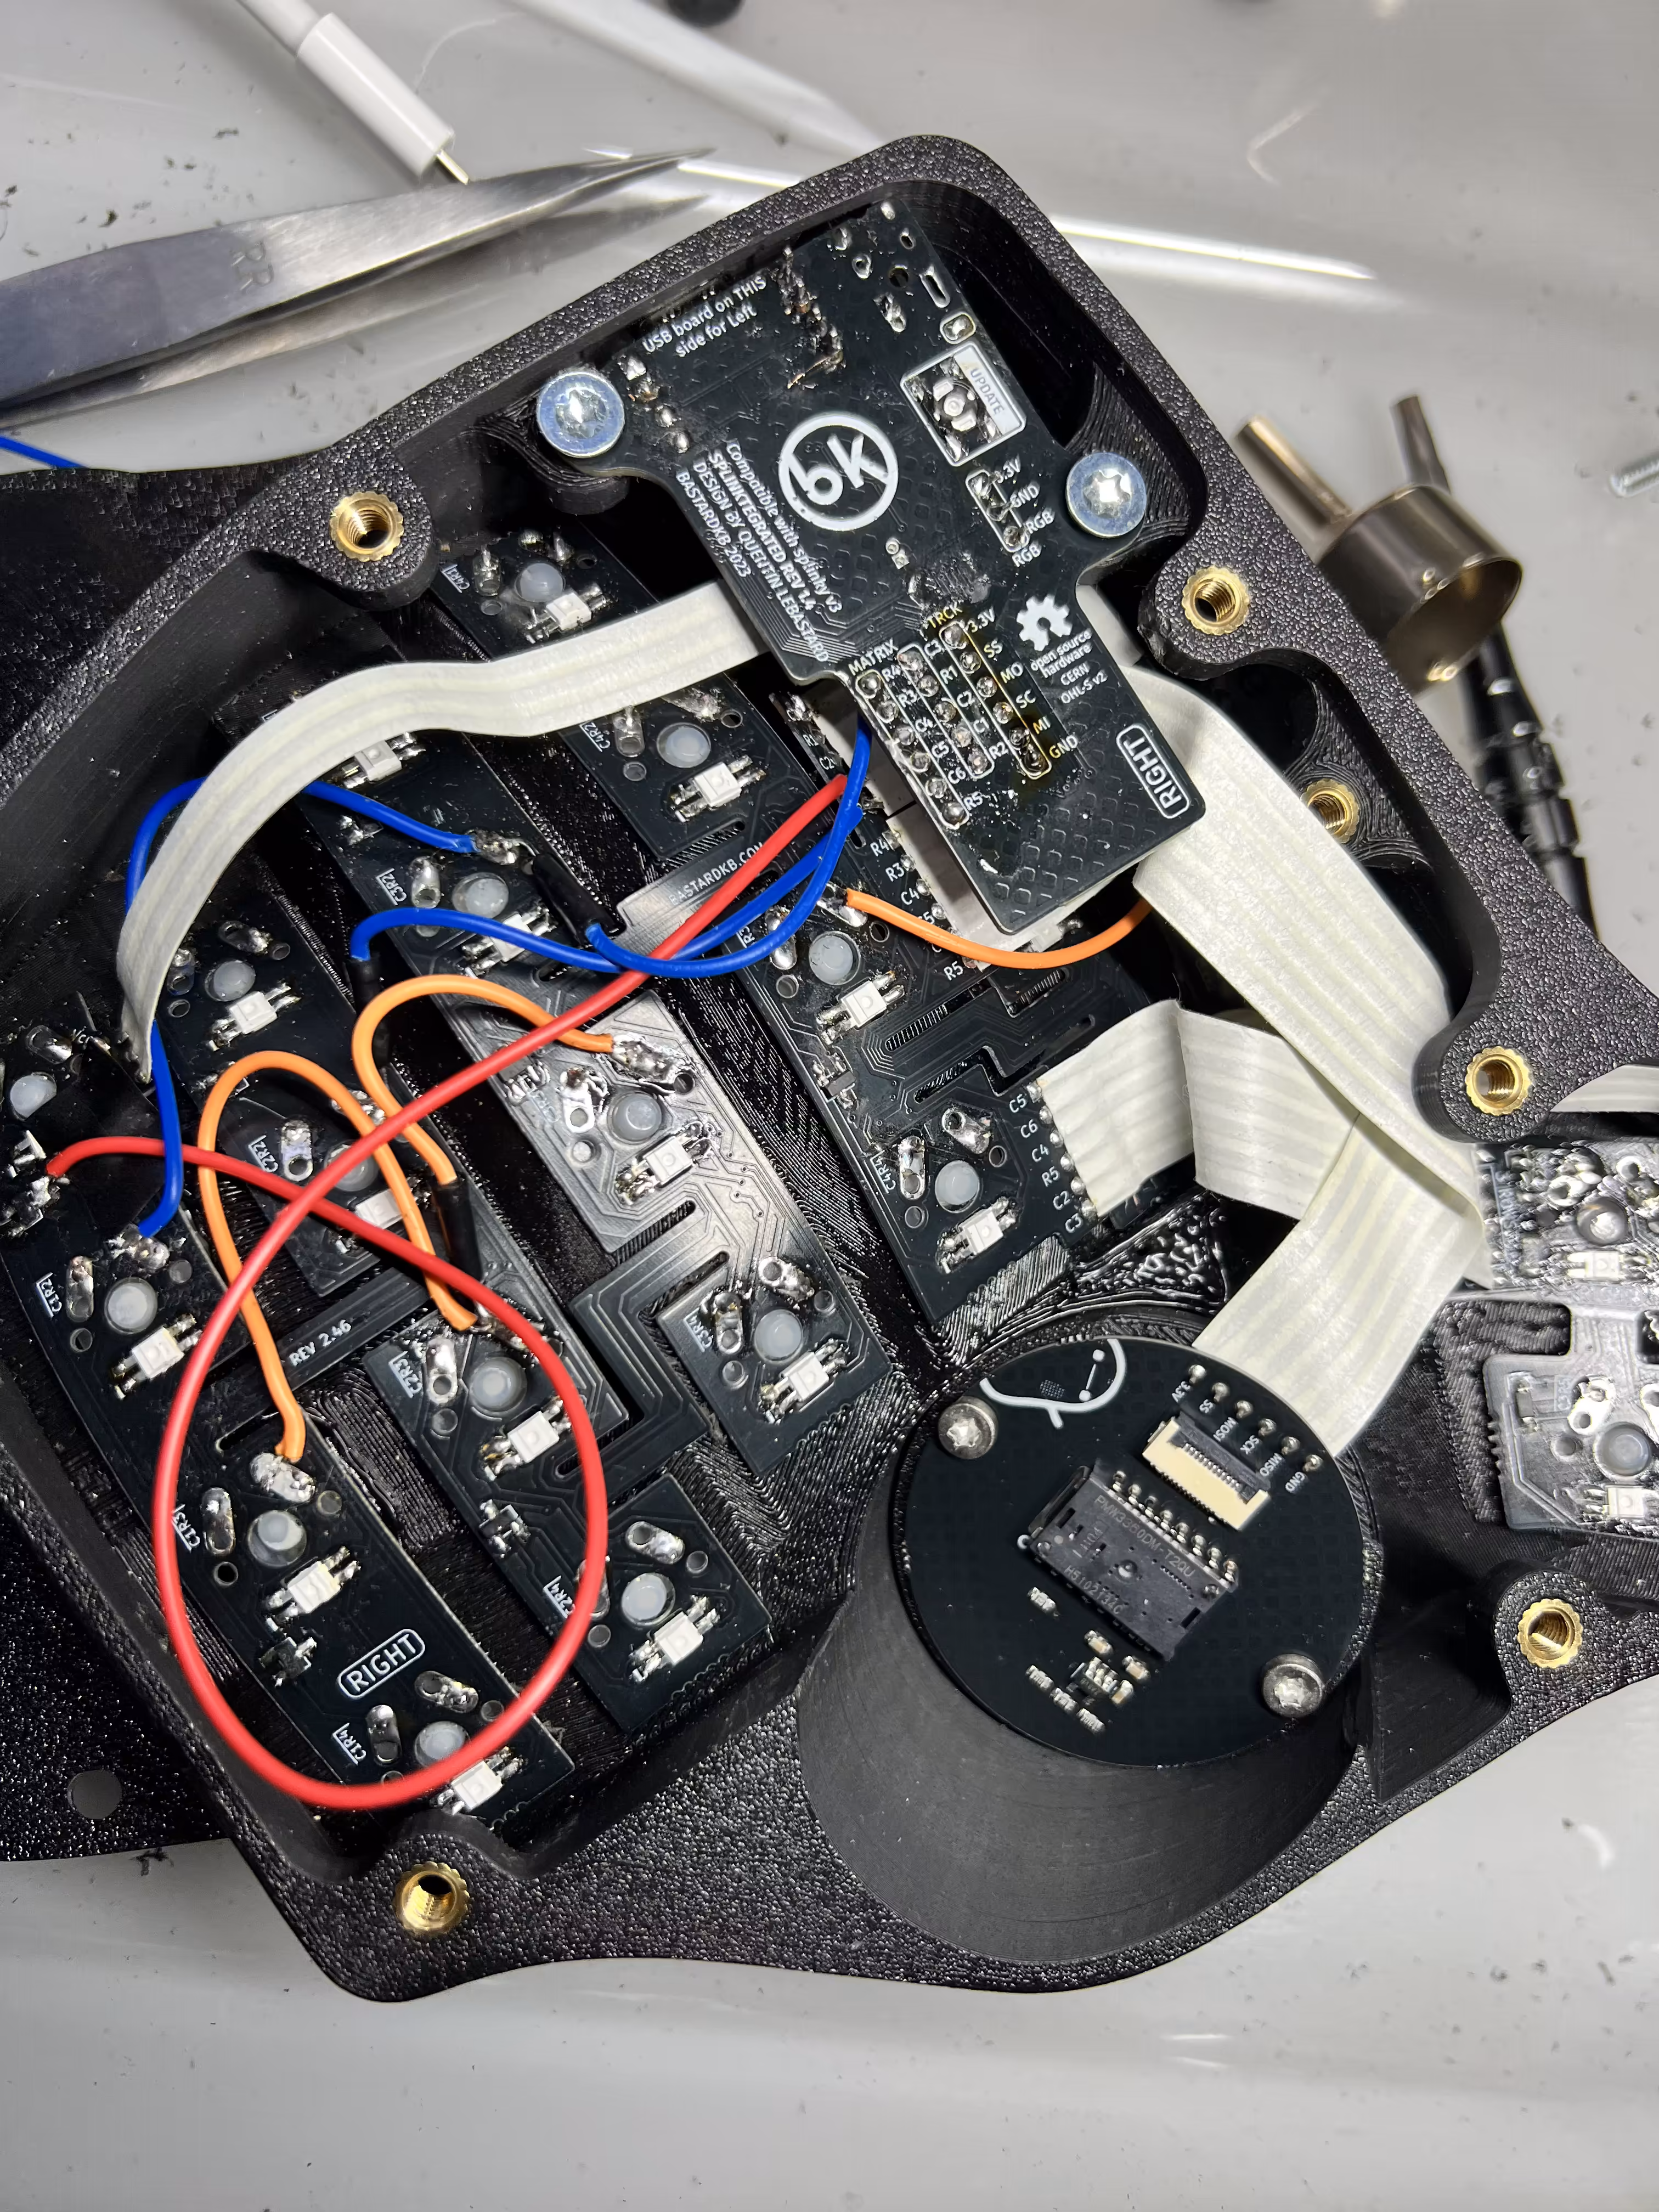
The trackball was another nightmare. The 3D parts didn’t fit — at all — where they should. I ended up using the iron and heat gun to basically form it manually and cut some bits out. And yes, hot glue was involved.
Buying proper tools is a good investment, if you can afford it. In my case I had just moved countries — that is my excuse.
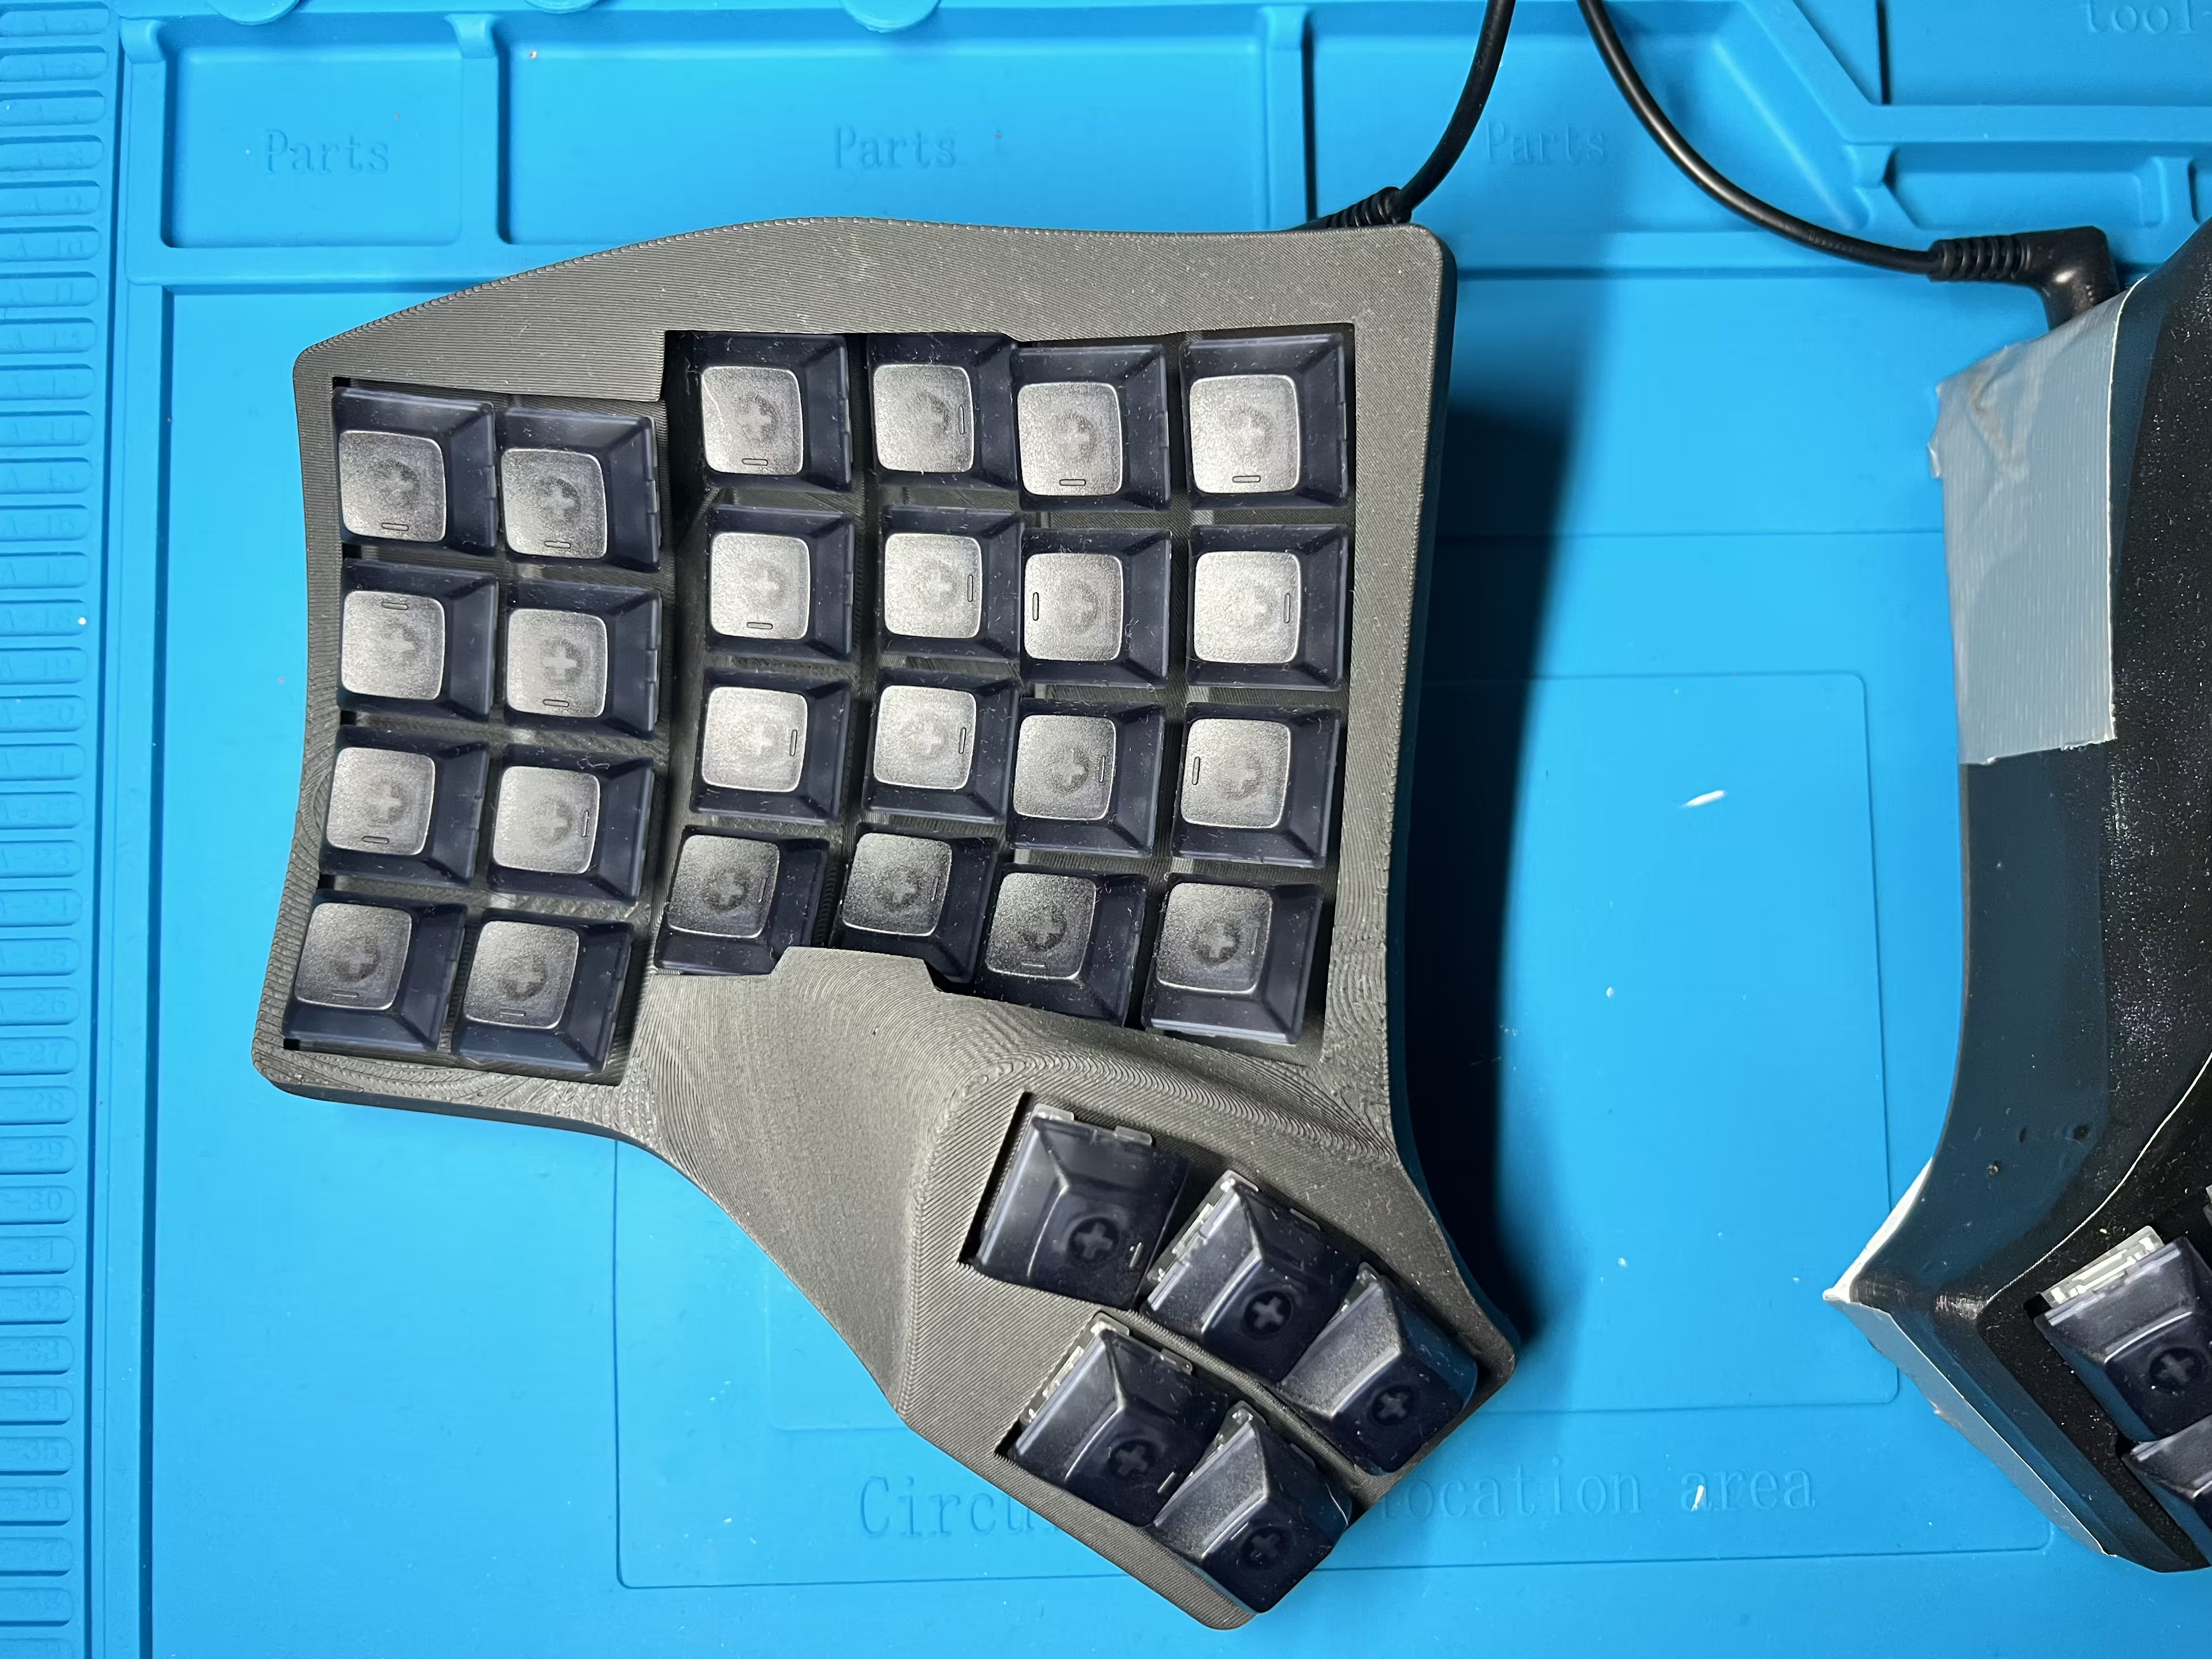
The left half went surprisingly well. The 3D printed case came out and I didn’t touch it. Diodes soldered neatly, switches just clicked inside the slots. The LEDs on either side ended up not working, or working partially (I think only 1 LED on the right side works, and about 12 on the left), but I really don’t care about LEDs so I’ll debug that later.
Always RTFM, or at least glance through it — heck, even use AI to give you a couple of paragraphs of summary. The 20 minutes you save skimming the guide will cost you an entire weekend and your dignity.
Does it work? Technically, yes. Every key registers, the trackball tracks. But the bodge wires and patched traces on the underside look like something out of a hardware horror movie. I also had to put tape and wedges underneath because it wobbles like a boat on dry land. I’m currently waiting on replacement parts to rebuild the right side. I might salvage the old one, but at this point I just want a clean, functioning keyboard.
The Switches: TTC Frozen V2 vs Cherry MX Silent Red
I don’t like loud keyboard switches — not for my own sake, but it makes me self-conscious. I worry about the noise I’m making and whether it’s annoying others, the same way it annoys me when someone nearby is hammering away on an obnoxiously loud keyboard. I wish I didn’t care, but hey, my ears are sensitive!
The Kinesis Advantage 360 uses Cherry MX Silent Red switches — linear, quiet, and smooth. They’re a safe, reliable choice. No complaints.
For the Charybdis I went with TTC Frozen Switch V2 linears. I was impressed with the quietness — in my mind, mechanical implied noise, but that’s not the case at all! They’re smooth, with a slightly different feel to the Cherry Silents. Most importantly, they are silent without being mushy. The sound profile is clean and satisfying without being loud.
If you’re considering building a board and want a budget-friendly linear that punches well above its weight, I’d seriously recommend trying the TTC Frozen V2s. I would also like to hear from anyone reading this if there are other silent switches I should be looking at — there are just so many choices.
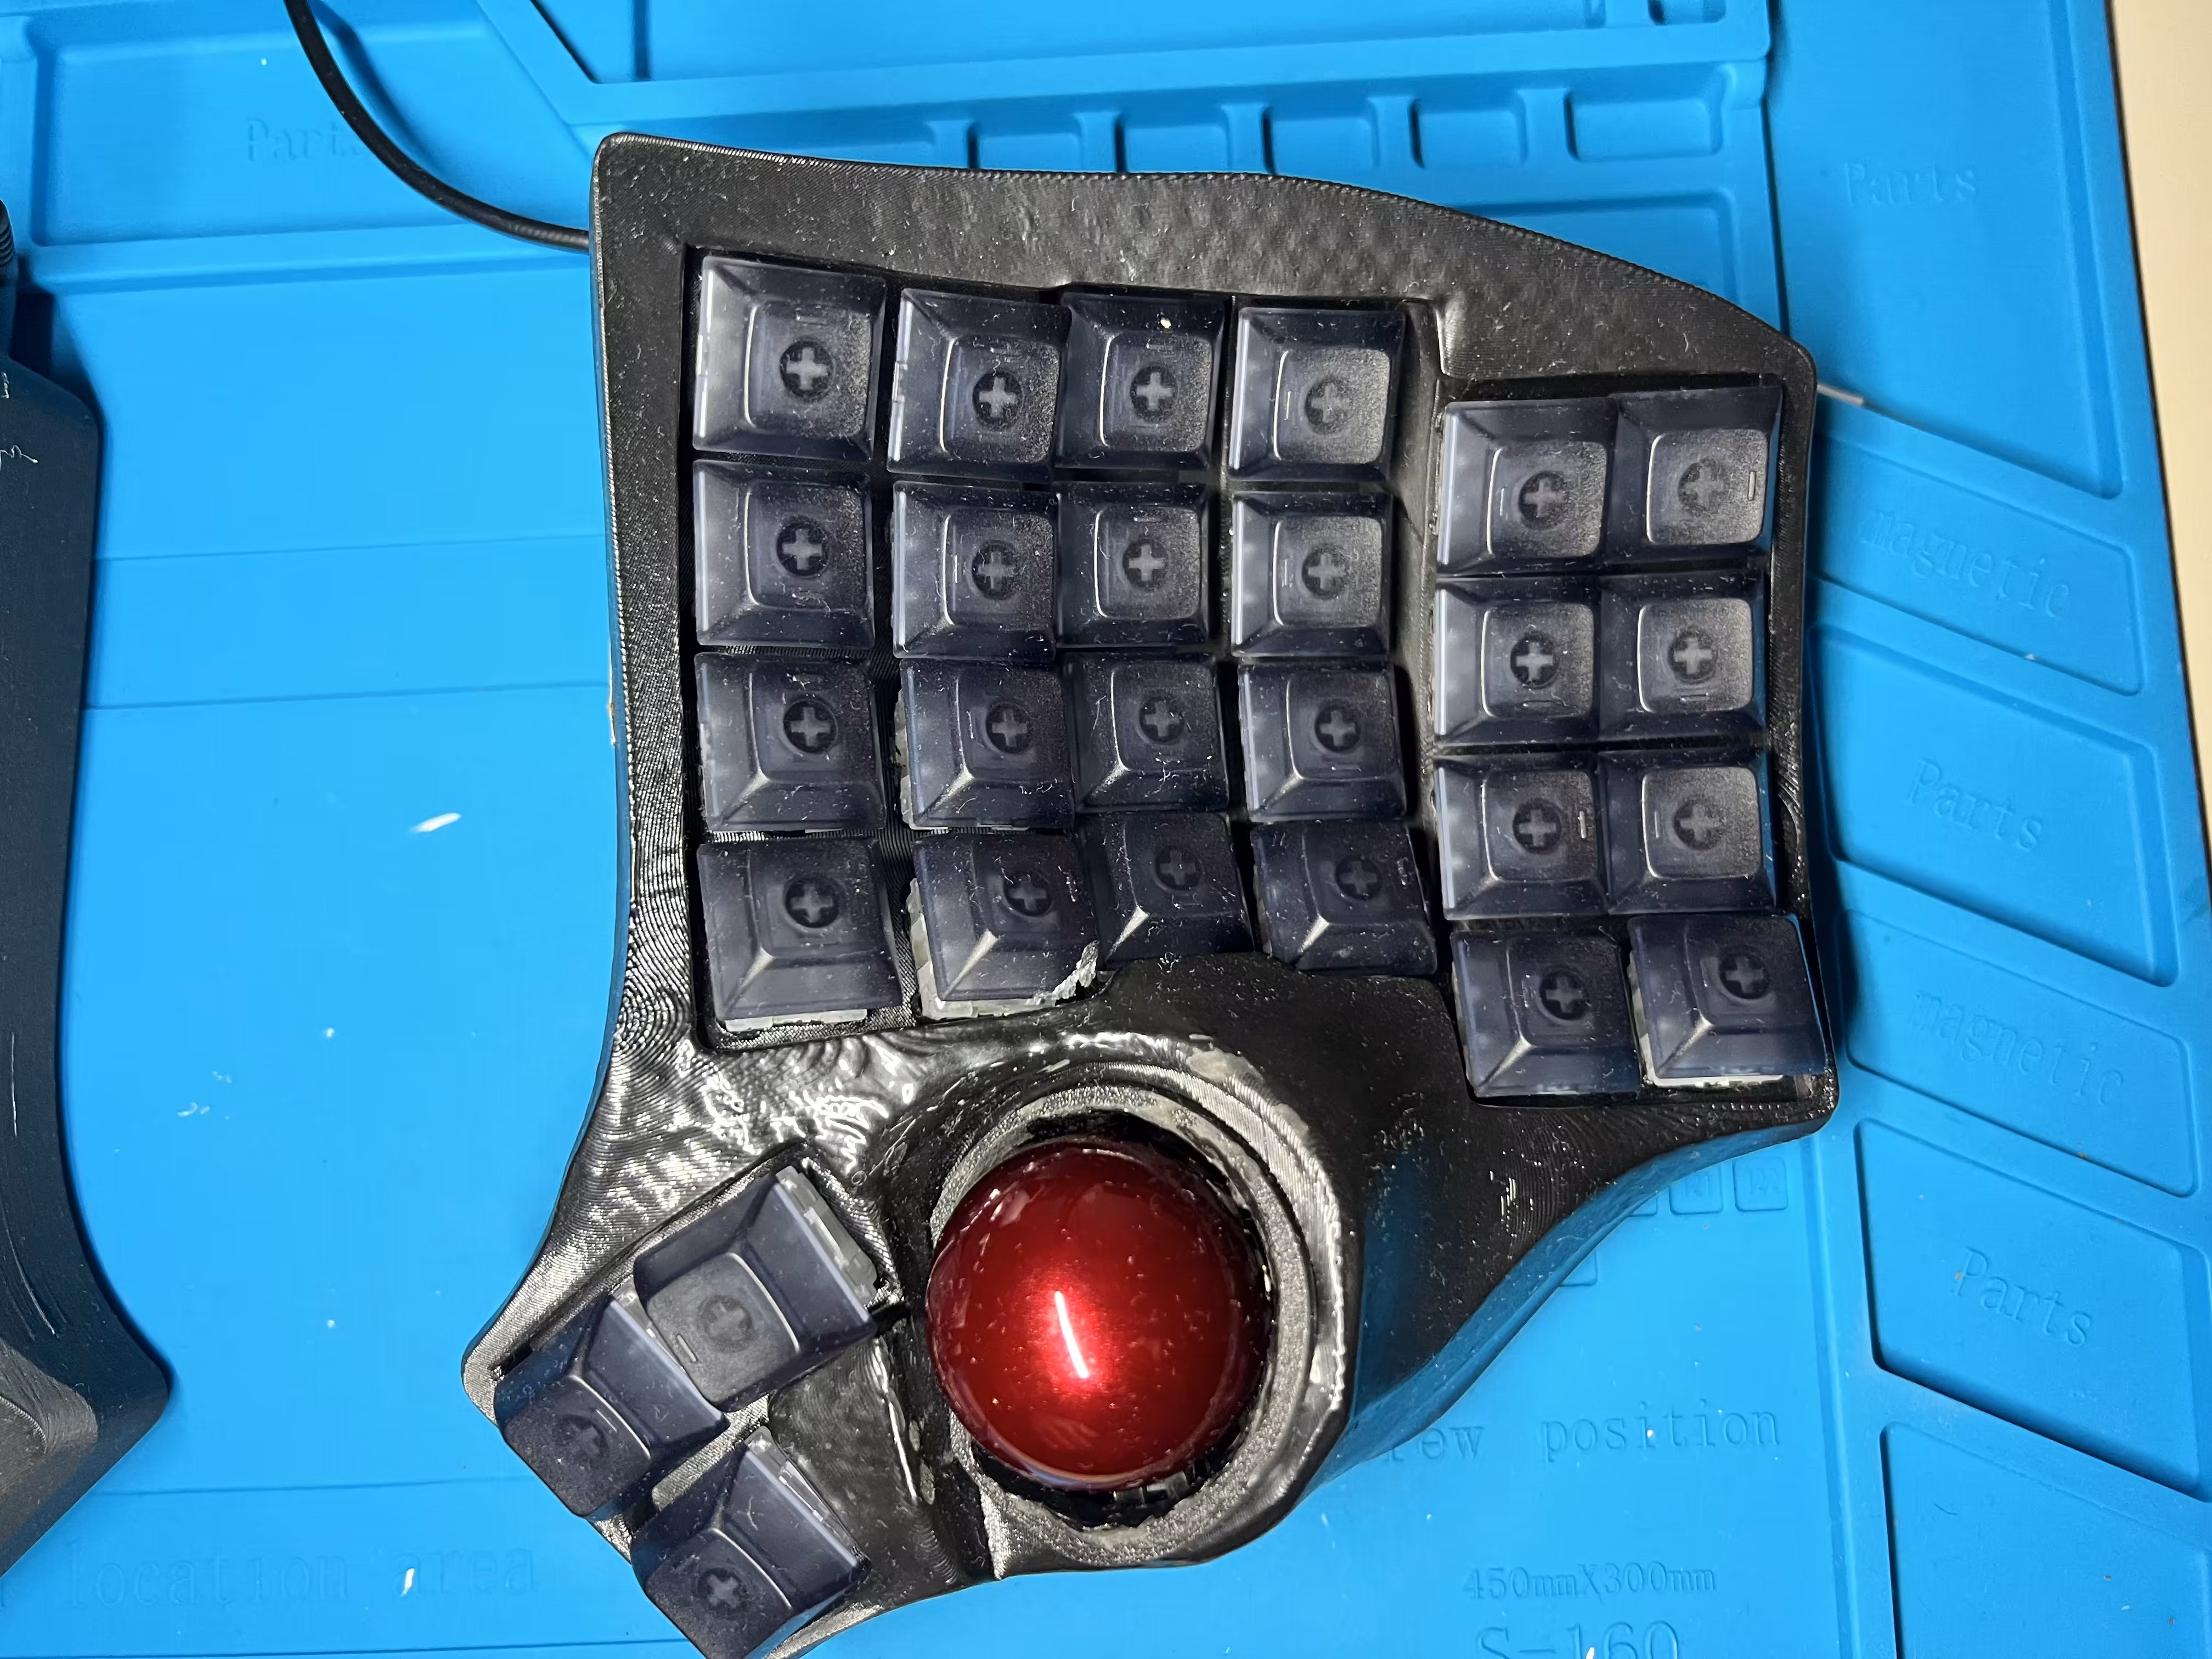
Charybdis MK2 vs Kinesis Advantage 360
The Kinesis is a phenomenal keyboard if you want something that works perfectly out of the box. But if you want full control over every aspect of your keyboard — and you’re willing to risk a weekend and your sanity — the Charybdis is hard to beat. Plus, you get a trackball. No more reaching for a mouse.
Here’s a side-by-side of both keyboards in action:
Was It Worth It?
I’m not sure yet — I haven’t actually used the Charybdis for any meaningful amount of time. I haven’t even customised the key mappings, so when I did try to type with it I was completely lost. I’m too used to the Kinesis.
I think I learned a decent amount though, so that was cool I guess. I can now solder SMD components (badly), troubleshoot broken PCB traces (reluctantly), and 3D print enclosures (one successful print counts). The left side of my Charybdis is genuinely one of the nicest things I’ve ever built.
The right side will get there. Eventually.
If you’re considering a Charybdis build, here’s my advice:
- Read the full build guide before starting. Yes, all of it. Even the parts you think don’t apply.
- Invest in a decent soldering station. A cheap iron will work, but a temperature-controlled station with proper tips will save you hours and heartache.
- Get a desoldering gun or quality solder wick. You will make mistakes. Having proper desoldering tools turns a disaster into a minor inconvenience.
- Take your time. This is not a race. Every rushed joint is a potential rework.
- The PCBs are reversible. I cannot stress this enough.